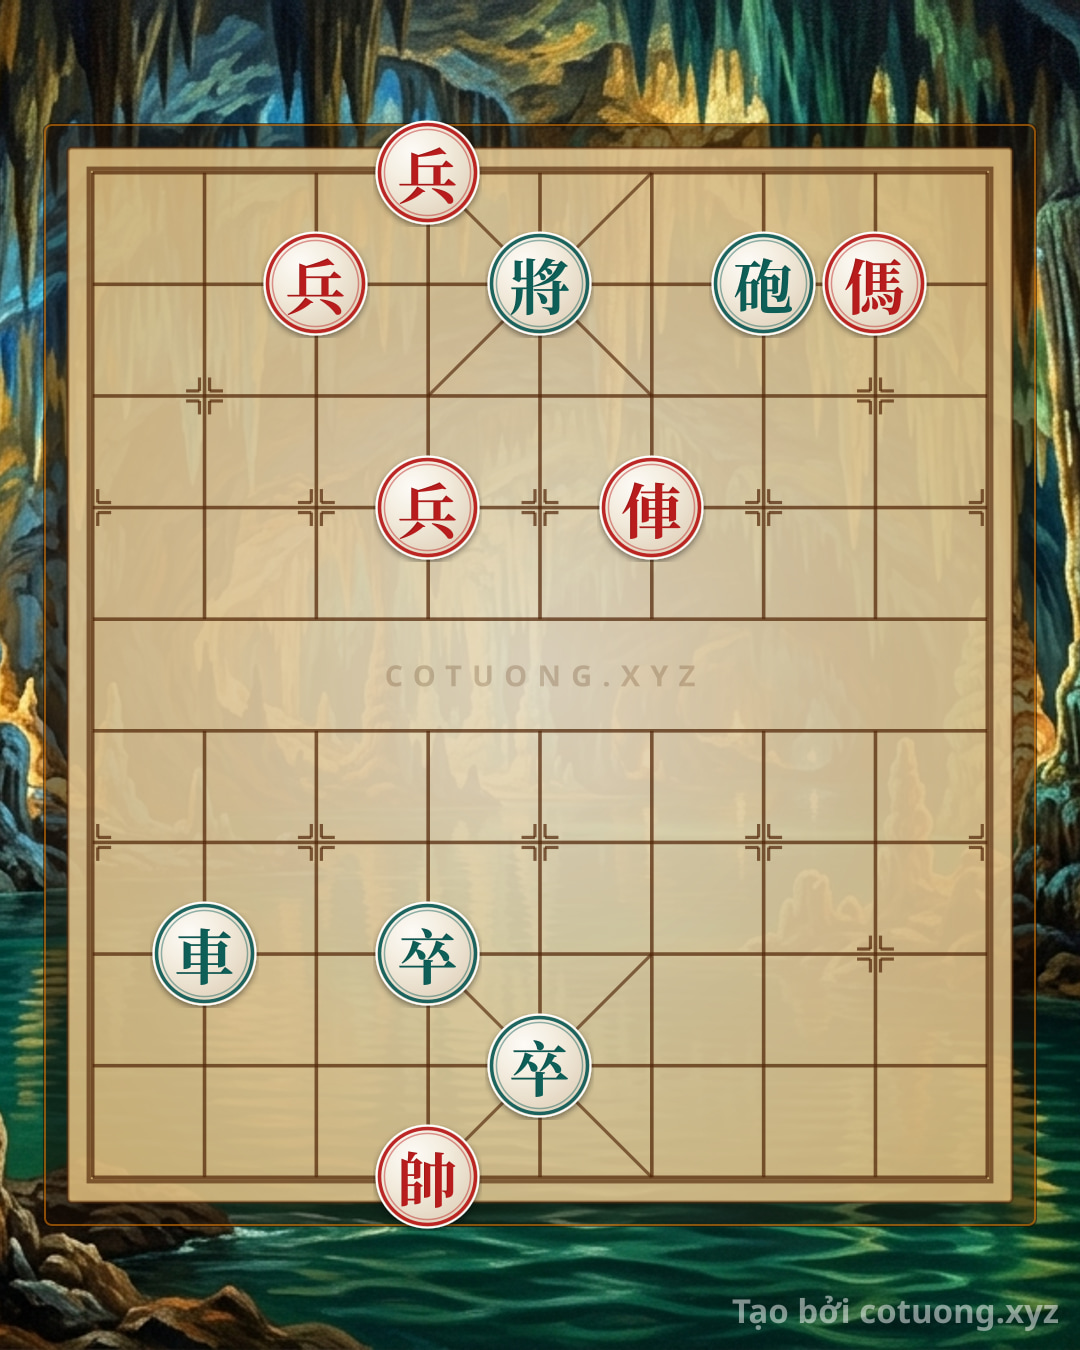
Challenge: Coordinating to the Red's Critical Position: Determining the First Strategic Move in the Locked Cannon Formation - Can you solve it?
This position is not an opportunity to avoid, but rather a chance to *tear apart* the balance with a direct attack. Red has exposed two key pawns on ranks 9 and 7, along with a revealed horse on rank 9—while the opponent still holds the General and Cannon on rank 9 but is interrupted by their own chariot. This is the moment when *one cannot afford to ignore* the coordination between the Horse's thrust and the Chariot's piercing strike from rank 7, aiming for both psychological and material pressure. This article will analyze **from a tactical perspective** the decisive moves, from breaking the opponent's weaknesses to maintaining initiative as they react—and concludes that: *this formation is one that cannot escape its final decision*.